
Monday, June 29, 2009

hand made soaps

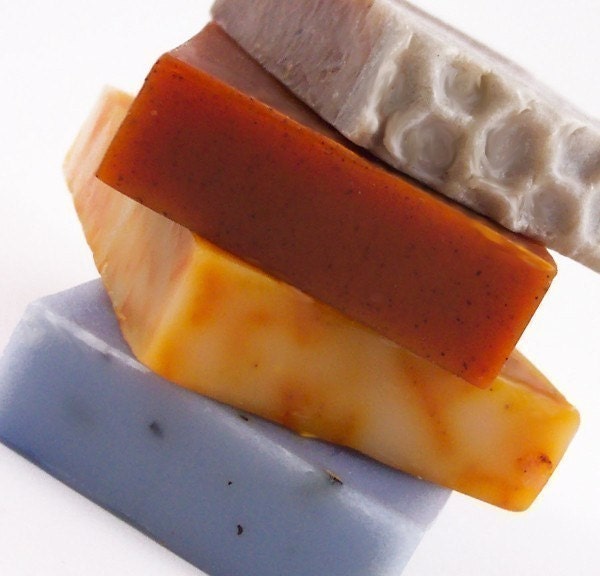
i have found a new love...handmade, cold process soaps!
i got addicted when i had these red bumps on the arms that itched and would not go away. when i saw the dermatologist, i found out i was having an allergic reaction to the chemicals in the soap i was using. surprise!

so i found handmade soaps...there's a super fab shop on etsy called alchemic muse, owned by karen toms. karen is full of super fantastic information...and has some uber awesome soaps to boot.
so sit back, and learn a little about home made, all natural soaps...decide on your own if theyare right for you!!

how do you create your soaps? they are so beautiful?
I create all of my soaps using the traditional cold process method from scrat
ch. I handcraft my soaps with pure vegetable and fruit oils, butters, herbs, clays, and essential oils.
{{alchemy muse is part of the etsy green and clean guild..good stuff}}

what about fragrance and fillers?
I do use high quality, skin-safe fragrance oils in about half of my body soaps. I do not use palm oil or cheap fillers like soybean oil or vegetable shortening.

bath soap. complexion soap. what??
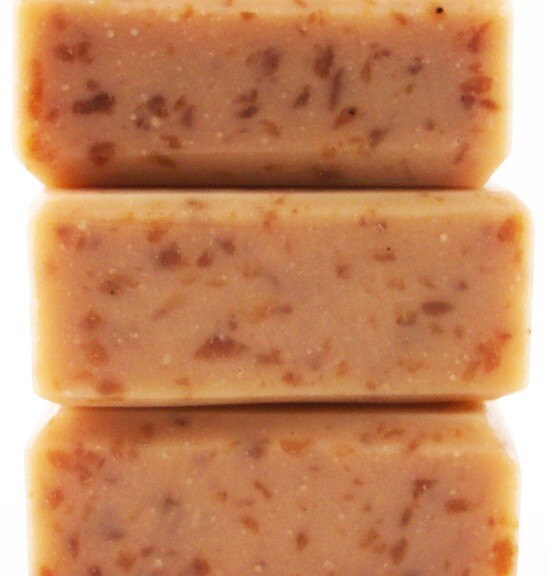
My complexion soaps took over a year to create and perfect, and are a different formula from my bath soaps. They include an profusion of exotic oils and herbs known for their benefits to specific skin types and problems.

These all-natural soaps are also scented with pure essential oil blends created with both skin and aromatherapy benefits in mind.

For example, Egyptian Geranium {pictured below} was one of the primary essential oils used to create Elixir. Egyptian Geranium is renowned for its benefits for mature skin, but is also used in aromatherapy to balance emotions – especially for menopausal women.
{{i am shouting hooray...can you hear me??}}

I am very excited to introduce these six soaps. There are no other facial cleansers like them on the market - they are truly one of a kind.

why handmade for you? for me?
Handmade soap has profoundly changed my life, as well as the lives of my friends and family. Before I used my first bar of handmade soap, I was constantly searching for soaps, washes, creams, etc. to improve my skin and make it healthier. One day I realized that even products labeled “natural” contained lots of chemicals and harmful ingredients that were actually creating more problems than solving them.

you say you like the idea of hand made soaps? really? well, how about a little freebie??? project{create a home} in conjunction with my home blog, a thorn among roses, are giving away a bar of your choice from alchemic muse.

to enter...go visit alchemic muse. leave a comment here tell me what soap you are in love with and why.
that's it! it's that simple!

enjoy your new found knowledge...and drop in on july 6th and find out who the winner is!!!
good luck!

post signature

Saturday, June 27, 2009

scrolling blog buttons

it's techie time again...and today we are going
to learn about adding a little funness in that blog sidebar of yours!

the scrolling blog buttons!! it's super easy...and now, you can do it yourself!!!!

start by editing your blog layout and selecting a new HTML box. in that box, you can choose to put a title, like "my fav's" or "places i hang out" or "peeps i pray for"...that sort of thing. {it should look like this...}


then the fun stuff! enter the first section exactly as noted here. {you can do this!!!}

the second part of the entry is actually entering the blog button HTMLs in. so head over to your buttons and grab the ones you want to scroll. put a space between each one so you can keep them straight, but use the HTML code as it already exists...the one noted here is for my bloggy friend, kacey at chronicles of a mommy...you get the idea.

when you get all the buttons entered, you simply add this HTML code to the end. it tells the box that this is the end and to quit scrolling!

happy HTML-ing!

danyele @ a thorn among roses

post signature

Friday, June 26, 2009

make your own first aid kit

everyone should have a first aid kit in their home...with all the supplies in one place for an emergency. you don't want to dig through the cabinet to find the gauze when there's bleeding!!

so, grab a quick container and print this list from the american red cross

your kit should contain:
2 absorbent compress dressings (5 x 9 inches)
25 adhesive bandages (assorted sizes)
1 adhesive cloth tape (10 yards x 1 inch)
5 antibiotic ointment packets (approximately 1 gram)
5 antiseptic wipe packets
2 packets of aspirin (81 mg each)
1 blanket (space blanket)
1 breathing barrier (with one-way valve)
1 instant cold compress
2 pair of nonlatex gloves (size: large)
2 hydrocortisone ointment packets (approximately 1
gram each)
Scissors
1 roller bandage (3 inches wide)
1 roller bandage (4 inches wide)
5 sterile gauze pads (3 x 3 inches)
5 sterile gauze pads (4 x 4 inches)
Oral thermometer (non-mercury/nonglass)
2 triangular bandages
Tweezers
First aid instruction booklet

since we are constantly on the run, i also keep a kit in my car that i picked up at the local pharmacy for under $10. i can honestly say it has been used a number of times...for bee stings, for cuts, for softball injuries, etc.

i also keep two sets of rubber gloves in the glove box in case i come upon or am involved in an accident and need to provide assistance. {i am first aid and emergency certified}. the gloves protect me and those injured...and it just takes a second of time to prevent any type of fluid transmission.
if you want to know more, please go HERE and the red cross will give you all kinds of good information!

post signature

Wednesday, June 24, 2009

Welcome, I have several different options for a July 4th decor, so I thought I start this week. I posted a table setting a week or so ago. Especially if you are having a crowd for the 4th, you will want to plan ahead to get all the great bargains out there before the stores are sold out.

I purchased most of these items at Walmart. They had great buys on melamine accessories and paper goods. The items below were found in the $1 section at Target (the kitchen towel that can be used as a large napkin for those messy BBQ's. The star bucket was from a couple of years ago though. The paper plates were from Walmart. $2.00 for a package of 8.
Below I changed the paper plate to white and added a star/striped paper napkin. The fabric on the table was from Joann's a few years back, they do have some nice fabric right now and there is a 40% off coupon.


The two items above were also purchased at Walmart for $2.50 each I believe. You can use the star dish for condiments, salsa or whatever you would like. It can also serve as the salad bowl for individuals salads. The plate is nice in lieu of paper if we really want to go "green". However, it would most likely be for a smaller gathering at $2.50 each.

Well I hope you enjoyed an early Red, White and Blue themed 4th. The only way to go. I will be adding to this 4th of July decorating post, so be on the look out.
Have a Happy 4th !

Expressively,

Sofia
post signature

Tuesday, June 23, 2009

flower power from bienvenue

susie from bienvenue is amazing! i was at her blog and saw this...and asked if we could just pass it along...it's super duper easy and fun...and well, fab-u-lous!!!!


I had some left over fabric from this project last year and had a lot of time on my hands....right hehe. So Maddy and I decided to give it a go and look what we made!

I must warn you though...you will not be able to stop. just look how cute it dressed up this 4.00 shirt.

And my cute lil wicker purse was just begging to try it on...

So sweet and so easy to make.

I started with just this paper template and then cut my little heart out. For wonderful directions I went here
and got the low down. I did shrink mine up a bit and plan on making covered buttons for the next ones. I just could not wait a minute more to show yall. So hurry and dig up all of those scraps you have been hanging on to....hope you come back here and share where you put your lil darlings. Have fun!

go see susie at susie harris...you won't be disappointed! i promise

Susie Harris

danyele @ a thorn among roses

post signature

Monday, June 22, 2009

{Crafty Fabulous For July 4th}

This 4th of July we will be at our family reunion which is being hosted a few hours away. Which means I will not be decorating or hosting a party myself. That simple little detail isn't keeping me away from ogling the holiday craft section at Martha though. Passhaaw! It's just too much fun!
I have to admit, when I laid eyes on these silverware pockets I gasped! I really did! I love them! I love how they used coordinating fabric and it just looks so festive but still a little unexpected. Yes, I'm in love with a silverware pocket - who knew! Click here for all of the juicy "How To" details...


I think these patriotic fans are just too precious and would make a sweet addition to any table setting during your 4th of July celebration! To download the template for the fans just click here. Yeah, because I'm nice like that...


I love this garland. Not only is it pretty but it can be used for different occasions by just changing the color scheme. Wouldn't it be great for a birthday party? Just change the color combinations: you could do pink, orange & yellow for a little girl's birthday party. Or even baby blue, green and yellow for a baby shower...For the "How To" details on this pretty & patriotic garland just click here.

So I'm in the spirit to decorate but I'll just have to admire. If you're looking for some great 4th of July project ideas head on over to Martha Stewart. Also, my buddy Lorie at Be Different...Act Normal has been featuring some fabulous ideas too! Have a wonderful day!


Kacey R.

post signature

Saturday, June 20, 2009

Father's Day Table

Father's day is here. Do you need an idea for a cute and easy table decoration. I came up with one after looking are the Better Homes and Gardens' website. They had taken beer bottles empty, using them to hold flowers, and had DAD written on them.

Well since my children are grown, we just took beer bottles out of the frig and used our PrintMaster program to get a Father's Day logo and print D A D out, cut them out and glued to the beer bottles.

We also found an old picture of the children, added roses from the garden, empty Mets beer cans and a baseball, dad favorite game.

We set the table around this centerpiece. Just a fun and easy way to decorate for Father's day with their favorite items. If you dad is more of a football fan, use a football and decorate around that. Any item that is dad favorite, use your imagination. Golfing, Fishing anything itemsthat says DAD would be fun. You can also use BBQ type napkins, plates if your having a big crowd.

Enjoy your Father's Day with your special DAD.

Expressively, Sofia
post signature

Thursday, June 18, 2009

fun and yummy

remember that good old betty crocker? well, she is still rescuing momma's everywhere!!

they aren't just fun to say, but they are cute, healthy and super duper cute too!

1 to 2 containers {6 oz} of yoplait thick and creamy yogurt {flavor of your choosing}
3 to 4 cups of cheerios
4 firm, ripe bananas
straws

line a cookie sheet with aluminum foil. spoon yogurt into shallow dish.
pour cheerios into another dish.
cut peeled bananas into 6 pieces
insert straw into each banana piece
roll each banana piece in yogurt...then in cereal to coat.
place coated bananas on cookie sheet and freeze uncovered about an hour or until firm.
{bites are best when eaten the same day}
serve in a fun cup filled with cheerios in the bottom.
healthy and fun...and have the kids help!!!

post signature

Wednesday, June 17, 2009

{father's day Gift Wrapping Idea}


I'm a presentation girl. I LOVE a good gift presentation and when I saw this on Martha I gasped! And it was just too cute not to share! For more fabulous Father's Day gift and craft ideas, hop on over to Martha Stewart. You know, she never lets a girl down! If you would like more information about these sweet bow ties just click here.
Have a fabulous day & feel free to visit me over at my place!


Kacey R.

post signature

Monday, June 15, 2009

{Outdoor Fabric Uses}

Outdoor fabric is a great way to update your outdoor space - recover cushions, add panels to create privacy or to simply add an element of interest. Our local fabric store recently had all of their outdoor fabric 50% off! So, it made me think...what could I do with that fabulous bargain of a deal???

If I had more time I'd love to use these beautiful spaces as my point of inspiration....

I could curl up for days on this sofa or kick my heels up in one of these chairs....the blue is so refreshing!

The black and white is so swanky - I love it! If it were at my house though it would have orange Popsicle all over it, but a girl can dream right? lol

This space couldn't get any cuter if it tried. Those chairs! That chandelier! That table setting! That swagged fabric! OH MY! I can taste the treats and fruit tea now!
{All photos from BHG.}

Kacey R.


post signature

Friday, June 12, 2009

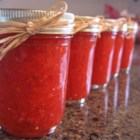
easy straw-peasy jam


we love strawberry jam...who doesn't, but i need something super quick that i can whip up while the kids are napping. so freezer jam is perfect!

when strawberries are in season {{now}} you can grab a few quarts for about $1, so you can have fresh jam for less than $3 for a few jars...here's what i do...as stolen from grandma e:

rinse and crush 2 cups strawberries, fresh {of course}
4 cups of sugar
1 package of {sure jell} dry pectin
3/4 cup water

mix the sugar and crush strawberries and let sit to juice for about 10 minutes.
mix pectin and water in a saucepan and bring to a boil for a minute or so. {directions will be on the box of pectin you buy just in case}
pour boiling water mixture into the juiced strawberries.
let set for about 3 minutes before adding to freezer safe containers...no need to boil and seal jars here...i use the glad take and toss containers bc they fit great in the freezer.
put the lids on and let sit out for 24 hours before freezing.
keep frozen until using...

danyele @ a thorn among roses
{{pic from allrecipes...here}}

post signature

Wednesday, June 10, 2009

new fashioned window

crafty sewing alert...my tribute to cheapness and 30 minutes of fun!
{you have been warned}

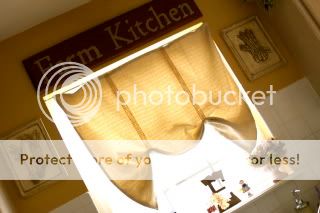
this is the window over my kitchen sink that looks out in the back yard...my "check on the kids" window!
the thing about this window...its literally the first thing you see when you walk in my front door...bc the hallway funnels right to it...and it just didn't have enough pizazz...so i decided to change it.
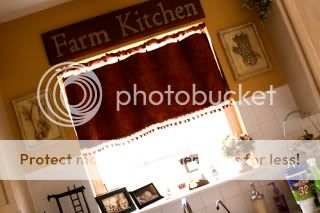
so some hugely discounted fabric...texas shopping find with my SIL meg...and viola...the after!

it had to be fast and simple, bc, well, that's all i have time for, so i literally folded the fabric in half, hemmed each of the raw edges and sewed them in a rectangle. simple.
then the pizazz...the fringe...isn't it fabulous?
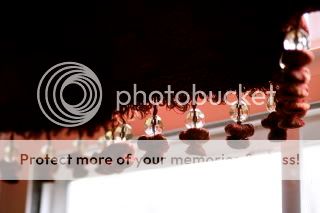
i pinned it on the front at the bottom and sewed directly over the top...thread color was close and you can't even tell! woo hooo!

final touch??? the cafe rod cover...ok, first, the cafe rod is from wal mart, used ont he initial window covering i made...it's a $2 cafe rod...ugly white with gold ends!!!
it had to be covered!

i took a scrap of the fabric from the curtain, sewed a tube and flipped it opposite of the curtain fabric.
the inside out fabric added the perfect touch of "different" and class to the window.

i bought a bag of black curtain clips {$4} and hung it up...and it's done.
{in way less than 30 minutes too}

you can do this...i promise. semi straight line sewing, no pattern...just go with it!
you never know what you can create until you try it!

danyele@ a thorn among roses

post signature